Table of Contents
How To Mark A Queen Bee
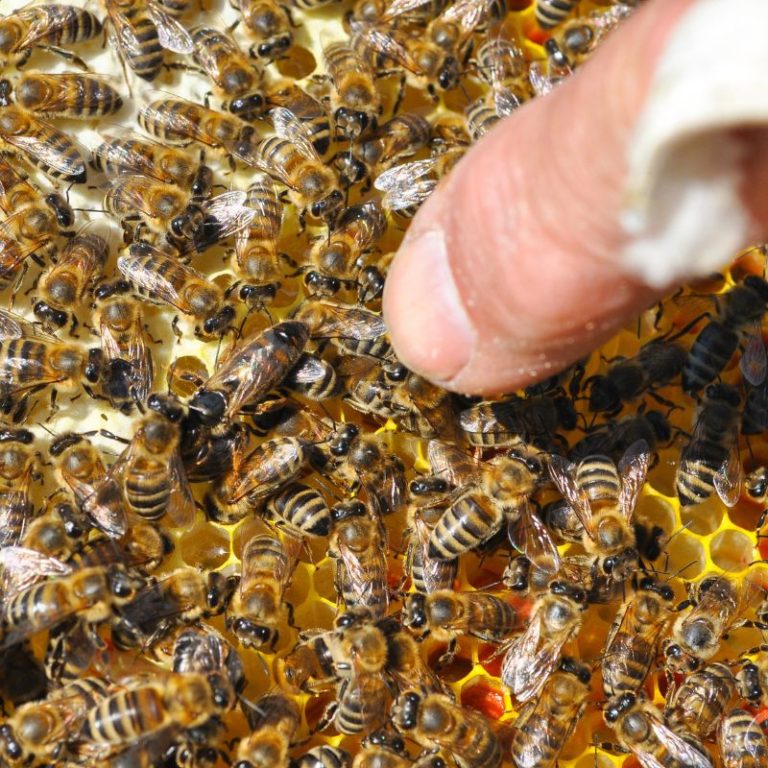
Marking queen bees may seem strange to a non-beekeeper, but it is fairly common in beekeeping. When buying a package or nucleus hive of bees, a beekeeper will often get the choice to have a queen marked or not.
An unmarked queen means a queen that is a virgin or mated and does not have any distinguishing marks placed on her by the beekeeper.
Marked queens have a small dab of paint or a sticker placed on the queen to bring attention to her inside the hive. This is to benefit the beekeeper and does not benefit the bees.
Of course, the decision is still up to you. Some professional beekeepers prefer not to mark their queens. But for some hobbyists or beginners, it makes finding the queen easier.
Why Would I Mark A Queen?
There are two reasons a beekeeper would want to mark their queen bee. Remember, it isn’t necessary to do this, but it can make beekeeping easier.
Marking the queen will make her easier to find.
Marking the queen will help the beekeeper track which queen is in their hive.
Easier To Find Inside The Hive
A colony of bees has tens of thousands of bees working together to make it run. Most are worker honey bees, some are drones, and there is typically only one queen. There are several tricks for finding the queen in the colony, but for new beekeepers, it may still be difficult to find her.
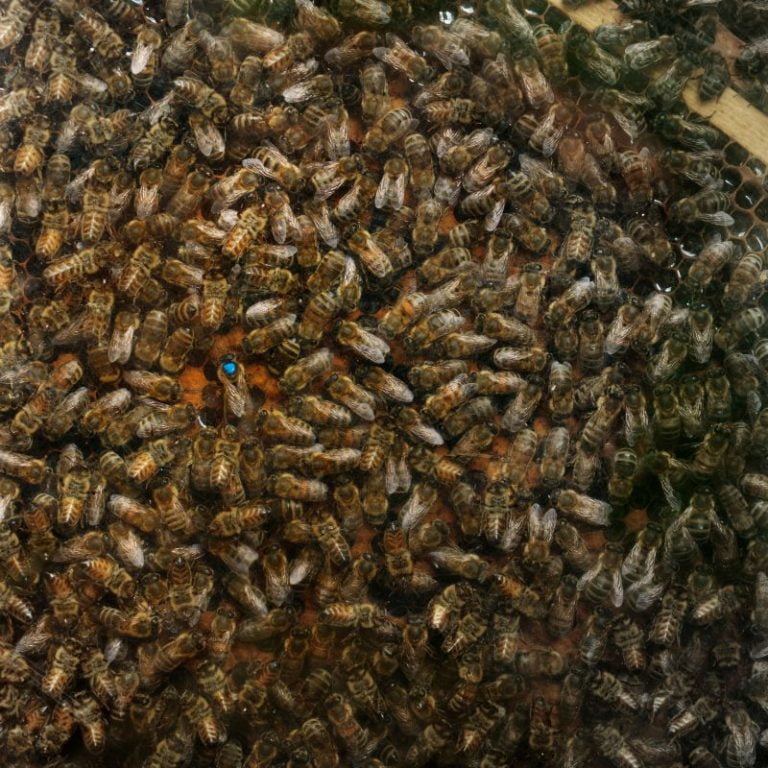
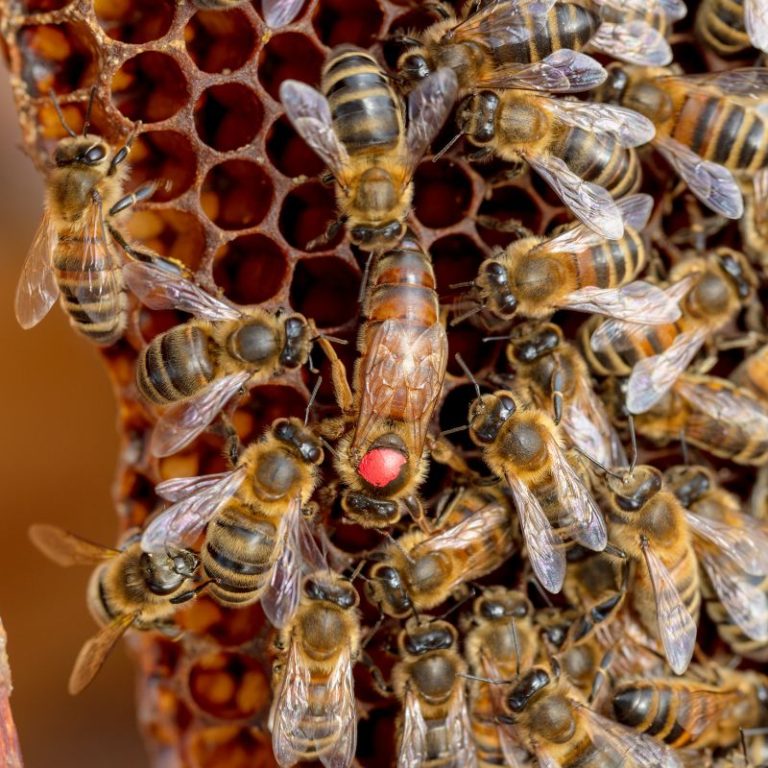
If the queen walks around the colony and has a colorful dot on her back, she will be much easier to identify. The queen looks different from a typical female honey bee, but the dot will make her that much easier to find. The queen honey bee, worker honey bee, and male (drone) honey bee all look very different to the experienced beekeeper, but for the beginner, it is difficult.
But if you love finding queens and need a little practice, check out our book all about finding queens.
Easier To Keep Track Of
The marked queen will also be easy to identify which queen is laying eggs inside the hive. If a colony swarms and replaces the queen, the new queen will not have a mark on her back, and this tells the beekeeper they have a new queen, and the original queen is gone.
To read more about how swarms work and what they look like, check out our other blog on swarms.
Beekeepers like to keep track of how old their queens are, and having a marked queen is an easy way to identify her age. An unmarked queen walking around the hive where there was a marked queen will tell the beekeeper they have a new, young queen inside the hive.
When beekeepers have a very special queen or a queen that performs particularly well, they may want to mark that particular queen with their paint pen to make sure she is kept track of. Queen bees can be very valuable, costing several hundred dollars, so marking those queens are very important. Those beekeepers call their queens “Breeder Queens,” often marking them with a sticker instead of a paint pen.

A colony of bees will replace its queen for various reasons, but it can be narrowed down to four events.
Usurpation – This one is the least common queen event and is usually associated with Africanized bees who will move into a colony of bees and replace their queen with their own. Talk about ruthless, right?
Swarming – A colony of bees will divide, sending out roughly half of the worker bees with the old queen to start a colony in another place. They leave behind the remaining workers and the new queen, who will take the place of the previous queen.
Supercedure – This queen event is when a queen is not performing well for a variety of reasons, and the colony decides to replace her with a new queen.
Sudden Death – A queen is killed, often by the beekeeper. This can either be on accident while moving frames or on purpose if the queen is not acceptable to the beekeeper.
Does Marking My Queen Hurt Her?
Marking a queen bee can be dangerous and is definitely a risker task when it comes to beekeeping. When marking the queen, it is possible to damage her legs, wings, or body. Marking the queen involves pressing on her and confining her for a moment so that you can see the danger in that.
Of course, you have to be careful in marking your queen, but there are tricks and tools you can use to make it safer. It’s very important that you do not squish the queen of your colony (unless you want to, of course)
I actually made a huge mistake while teaching a beginner class. We found the queen in the colony, and while showing the queen to them, I decided to show the class how to mark her with a queen pen. During the marking process, one of her legs got caught in the queen marking cage, and I injured her. Because she was injured, she was superseded within a few weeks with another queen.
I knew she was superseded successfully because the next queen I found in the hive was not marked.
Where Do I Mark The Queen?
There is only one spot to mark a queen correctly. There is a small area behind her head and her thorax. Putting it simply, there is a bald spot on her back where her “shoulder blade” is. This round spot is just the right size to place a dab of ink and won’t interfere with her ability to lay eggs.
Practice makes perfect when marking queens, so it is good advice to mark the drone bees (boys) first, and once you are comfortable doing that, you can mark your first queen. The good thing about the queen marking tools available is the screen is just the right size for marking the queen. The little squares on the screen fit perfectly over the small area on her back where she should be marked.
What Can I Use To Mark A Queen Bee?
Marking a queen bee is not the easiest thing to do for a beginner and is not a recommended task for a brand new beekeeper. That being said, there are a few ways beekeepers will mark their queen. No matter what tool is used, it must have some sort of marking pen or ink. More on this later.
Beekeepers use some type of queen cage or catcher to mark the queen, or when experienced with bees, a beekeeper can actually use their fingers.
There is a tool called a queen catcher that looks like a clip that is not used for marking queens. This clip is not a queen marking tool but is actually used for catching the queen and isolating her. It isn’t designed to keep her still for marking but is just for keeping her safe for a short period of time.
Use Your Fingers
When using your fingers, a delicate touch is required. Queens can be rather tough, but at the same time, it doesn’t take much to injure her if being careless. You can pick her up by one or both of her wings; this will not harm her; however, you should do it calmly. You can also pick her up from behind as she is unlikely to see your hand coming.
It is better to pick the queen up by her wings as they are easier to grab and less fragile than grabbing her abdomen or thorax. Her wings are durable, but the abdomen can be damaged if using too much pressure.
It is better to grab the queen and handle her with your bare hand instead of a gloved hand. If you would like to use a gloved hand, use latex or nitrile gloves to prevent stings. These gloves will help protect your hand but still provide full dexterity in the finger. Wearing gloves that are made of leather can make marking queens difficult.
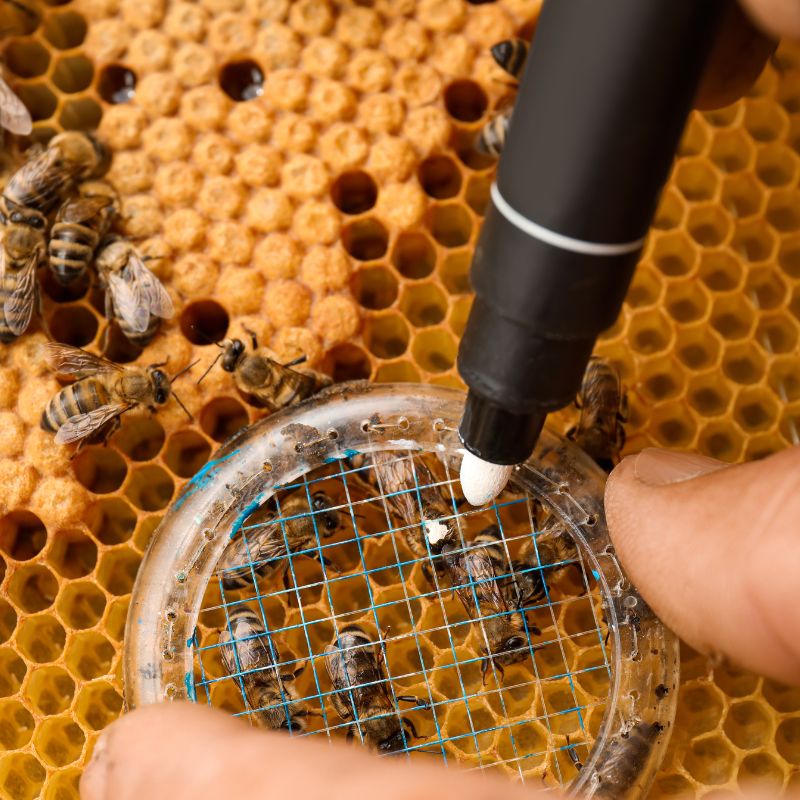
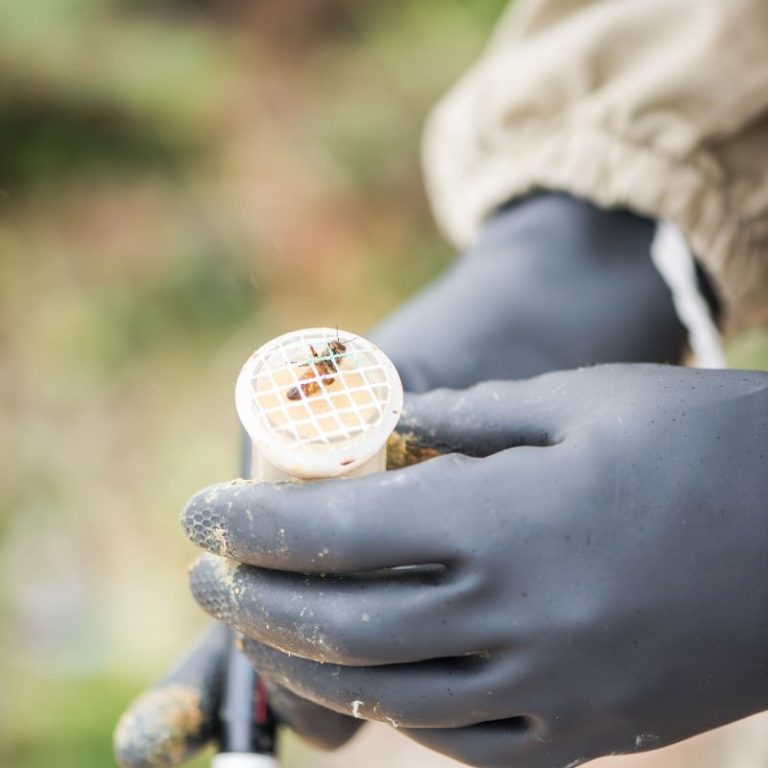
Push-In Queen Marking Cage
The push-in cage queen marking cage is a small circular disc with prongs that are used the press into the face of the comb. Over the circle is a screen that actually presses down on the queen and confines her for a short period. While she is lightly wedged between the screen and the face of the comb, she is marked with the pen.
There are metal and plastic discs, and the metal ones are much better than the plastic ones. The metal ones are easier to use because of their weight and size.
Queen Marking Tube
There are many versions of this type of tool. Some of them are a long tube with a plunger like a push pop. The queen is hearded into the tube and gently pushed with the plunger towards the screen on the top of the tube. Very gently, the queen is pressed against the screen, where she is immobilized and then marked.
While there are many types of these, we have used multiple versions and really prefer the one-handed queen marking tube. It is just easier to maneuver while still being gentle and holding the queen pen in the other hand.
Queen Marking Pens
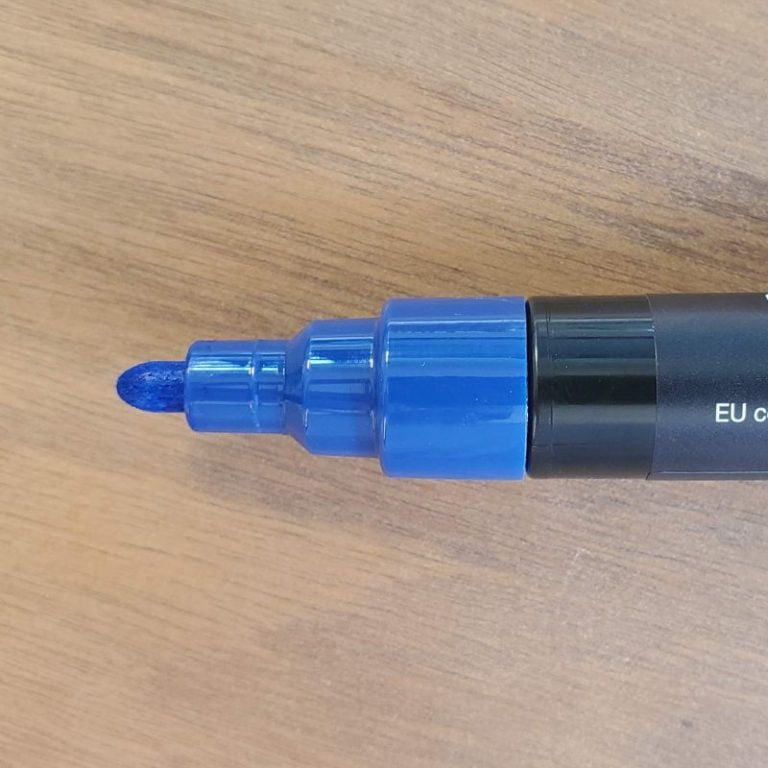
The most popular tool used for marking the queens is the water-based pen made by POSCA. These pens have been around for a long time and are the right size for marking the pen. The ink doesn’t bother or affect the queen because it is non-toxic, and the pen does not require much pressure on the queen to get the job done. Honey bees are sensitive to foreign smells, so it is a good idea to use non-toxic options whenever possible.
There are a lot of colors and sizes available in these pens, but the 5M size is the correct size for marking the queen. The diameter of the tip makes a big difference, and 5m is perfect. You will often see a year attached to the queen marking pen. Queen bee marking colors vary by the year, but each color refers to the year the queen is born. It’s a 5 color system and is used internationally by beekeepers.
Read More About Queen Marking Colors
This is the color guide for marking bees. They go by the year the queen was born. For example, queens born in either 2028 or 2023 would be marked with a red dot. The color code is used by most beekeepers if they are not using the numbering kit with the small stickers with numbers on them.
Years that end with 1 and 6, use a white posca pen.
Years that end with 2 and 7 are yellow posca pens.
Years that end with 3 and 8 are red posca pens.
Years that end with 4 and 9 are green posca pens.
Years that end with 0 and 5 are blue posca pens.
To read more about the queen marking pens, click here.
It’s not imperative to use the correct color for the year unless you are selling queens. An internal color system for your queen marking kit is perfectly fine. Marking queens is done by experienced beekeepers who are raising queens, as well as backyard beekeepers who mark queens for their own needs.
Beekeepers will also use Testors model paint when making a new queen, but we don’t have experience in using this particular product. We tend to find the product that works great and stick with it.
How To Mark A Queen Bee, Step By Step
If you’ve now decided to mark your queen bee, there’s no need to fret! We can teach you how to mark a queen. It’s pretty straightforward in the big picture, but the details are important.
Find The Queen On The Frame
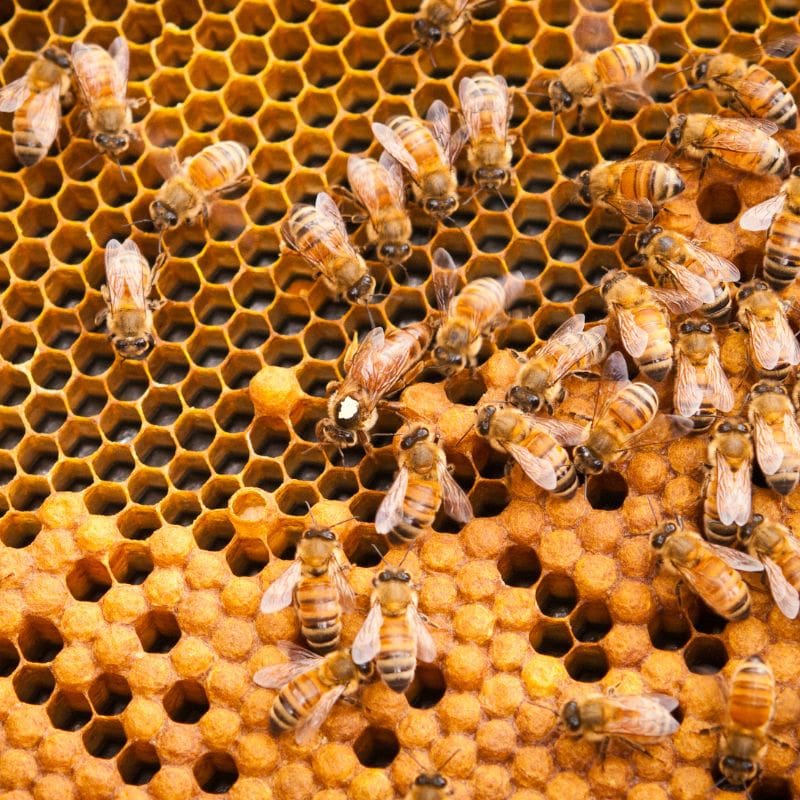
Finding the queen in the nest can be really difficult for the beginner beekeeper. She is one of tens of thousands of bees moving around constantly. She likes slightly different than the other bees, but to the beginner, she is hard to identify from the works and the drones.
When we want to find a queen, we look for brood and eggs first. When you find the eggs and larva on a frame, you know the queen was there recently. It’s likely that the queen is still in that area as she doesn’t wander around the hive without a purpose.
It’s unlikely that you would ever find the queen up in the honey boxes instead of down in the brood nest where she is laying eggs. This means that she can be found in one of 20 frames instead of 30 or 40 frames.
In those 20 frames where the brood nest is, it’s likely the eggs and larva can be found on only 4 or 5 of those frames, with the fresh eggs being on 2 or 3 of those frames. We narrow down those frames and start looking through those first.
Grab Her With Your Hand Or With A Queen Tube Or Cage
Now that you have identified where your queen is, the next step is to separate her. Using the tool you chose to capture her, you will isolate her in it to mark her.
Remember you want to isolate her so that her back is pressed against the screen gently or if using your fingers, her back must be held still so she can be marked.
Push-in Cage
When using the push-in queen cage, you are trying to find the queen walking around on the frame. The queen is moving around constantly, so you have to work quickly when given the opportunity to isolate her. When she is holding still for a short second, you will gently trap her on the face of the comb.
Pressing the tines of the queen cage into the comb will hold the cage in place and the queen in the cage. Slowly push down and immobilize the queen in the cage, preventing her from moving.
Queen Marking Tube
The queen marking tube isolates the queen but in the actual tool instead of on the surface of the comb. These tubes come in all shapes and sizes, but they all work in a similar way. The queen has to be found on the frame and then coerced into the tube. This is usually done with your hive tool or the plunger that comes with the queen cage. Eventually, when given enough tries, the queen will walk into the tube.
Once the queen is in the tube, you can push her gently towards the screen until she is gently isolated against it.
Marking The Queen
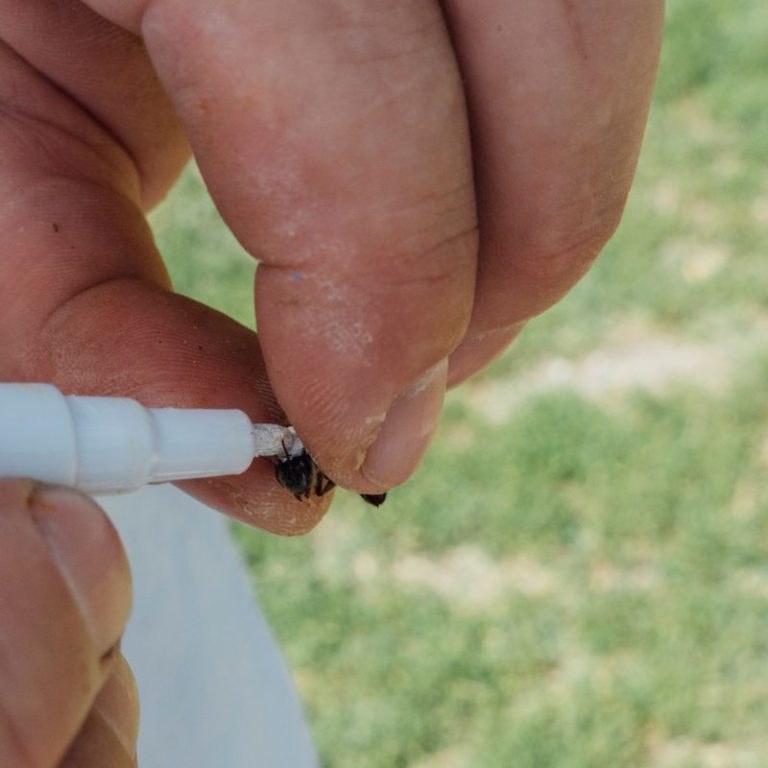
Here’s the part you’ve been anxiously waiting on. Don’t worry; this gets easier each time you do it. The POSCA pens have a tip that releases ink when it is pressed. They don’t work as a normal ballpoint pen, so you can’t use it that way.
Prior to getting the queen in the queen cage, you will want to prime the pen and get it ready. This starts with shaking the pen back and forth to mix the ink in the pen. You’ll hear a little ball moving around in the ink, the same as a spray paint can.
After shaking the pen, you want to prime the tip of the pen by pressing it onto a hard surface and holding it. We use the edge of our box and hold it there until the ink comes from the tip. You want the tip to be wet with ink when you mark the queen, but not absolutely dripping. This is where having the correct 5m posca tip helps.
With the pen primed and the queen confined, you want to touch the queen’s back with the wet ink gently. The tip should be wet enough to touch the queen gently without pressing on her. You can keep dabbing the queen until there is just enough ink on her back to see her easily, but not so much that any ink gets on her wings.

Release The Queen Back Into The Hive
It’s important not to rush to release her into the hive. The ink should stay on her back and not spread onto her wings or legs. Releasing the marked queen too quickly with wet ink on her back may cause it to spread and damage the queen.
To prevent this, allow the ink to dry for about a minute while the queen is still in the cage before releasing her. You can let her walk around in the cage, but you want to give the paint a few seconds to dry completely before letting her go. We often just set the queen to the side for a few minutes while continuing our hive inspection.
After releasing her into the hive, she will get back to laying eggs quickly. The paint is very durable and should last the life of the queen. So there shouldn’t be any need to reapply the paint a year later.