Table of Contents
Installing a nucleus colony (nuc) of bees is an exciting and rewarding experience, especially for beginner beekeepers. Not only does it provide the opportunity to work with a small, established colony, but it also sets the stage for a thriving apiary.
See the nucleus hives we have for sale.
Starting a colony of bees with a nucleus hive is a much more reliable way for a beginner beekeeper to start than with a package or a full-sized hive.
Ready to embark on this fascinating journey? Let’s dive into the world of nucs and learn “how to install a nuc of bees” step by step.
If you would rather watch a video on how to install a nucleus hive, check out our walk through on how to install a nuc.
Short Summary of How To Install a Nucleus Hive
Nucleus hives are the core of a full sized hive and include everything a colony needs to start growing.
Essential tools, protective gear, and equipment to transfer into must be gathered before transport of the nuc.
Post-installation care includes regular feeding, monitoring queen quality and laying patterns as well as troubleshooting common issues.
Understanding Nucleus Colonies (Nucs)
A nucleus colony, or nuc for short, is the heart of a hive and an ideal option for novice beekeepers. It contains a mated queen that is already familiar with the colony, as well as sufficient worker bees to sustain the nucleus hive.
Starting with a nuc or nucleus hive offers several advantages, such as an established colony, faster growth, and easier integration into a new hive.
But what exactly is a nuc made of, and why is it so beneficial for beginners? Nucs are typically made up of five frames of bees, including frames of eggs, honey, pollen, and comb.
Components of a Nuc
A bee nuc generally consists of nuc frames, bees, brood, and food stores like honey and pollen. The typical size of a nuc is a 5-frame box with deep-sized frames, which can be transferred to a full-sized hive for further colony development.
A nuc can also come in a medium box in medium frames, but it is less common.
In a five-frame nuc, all the frames play a crucial role: the three inner frames usually house brood of all developmental stages, while the two outer frames are stocked with honey and pollen, contributing to a productive colony.
Benefits of Starting with a Nuc
Starting with a nuc offers a range of benefits for both the bees and the beekeeper. An established colony means that the bees are already familiar with their queen and have begun laying eggs.
This accelerates colony development, as the presence of a brood and a continuous egg-laying cycle ensure a stable population. Furthermore, nucs can be used to reinforce weak colonies, providing them with additional support and a stronger foundation for growth. In order to use a nucleus hive to reinforce a colony, you will have to remove the queen from the weak hive.
Check out our Beekeeping 101 blog post for a guide to getting started with beekeeping.
Preparing for Nuc Installation

Master Guide – What Beekeeping Equipment Do I Need?
Figuring out beekeeping equipment is the most intimidating part of getting started in beekeeping. There are a lot of options, designs, and equipment configurations to
Before installing your nuc, it’s essential to gather the necessary tools and select the right type of hive for your colony. Ensuring you have everything you need will make the installation process smoother and more successful.
Remember, it’s not recommended to open a bee hive or nuc when the temperature is below 60°F (15°C). This is because bees need to keep their brood warm, and keeping it outside at temperatures below 60°F (15°C) for too long can chill it.
You can certainly install the nuc at cooler temperatures; you just want to be quick.
Gathering Essential Tools
Having all necessary beekeeping equipment and tools on hand is crucial for a successful nuc installation. This includes a reliable hive tool, a smoker, and safety attire such as a protective jacket, pants, and gloves.
Make sure your hive equipment is assembled and placed in the designated area before the arrival of the new nuc. This also includes the hive stand as well. You want everything to be in its place before setting up your nuc in its permanent hive.
A smoker should be prepared and ready to use, as it can help calm the bees during the installation process. It isn’t required, but it’s highly recommended to use a smoker.
Transporting Your Nuc Safely
Transporting your nuc safely is crucial to ensure the health and well-being of your bees. After picking up your nuc from the supplier, you’ll need to store it properly before installing it in the new hive.
Proper transportation and storage will help keep your bees content and minimize stress during the installation process.
It is important to make sure that the nuc is securely fastened in the vehicle, as this will make the transfer safer and also reduce stress.
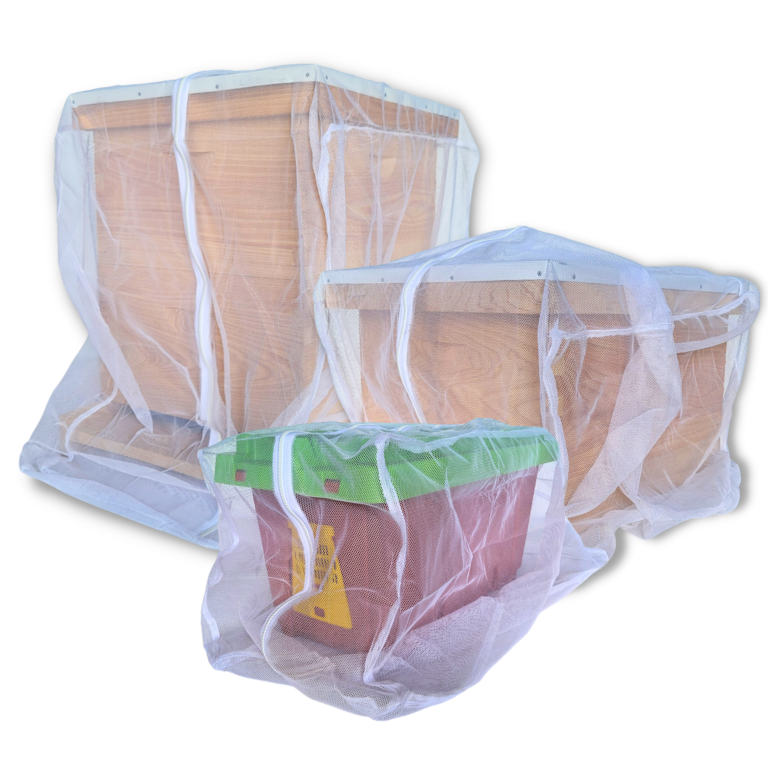
There is a product made specifically for transporting bees called a buzz bag. There are 3 sizes to fit different hives, but the Nuc Bag is perfect for nucleus hives or package bees.
When we give nucleus hives to our customers, we always try to minimize the stress on the bees and their beekeepers.
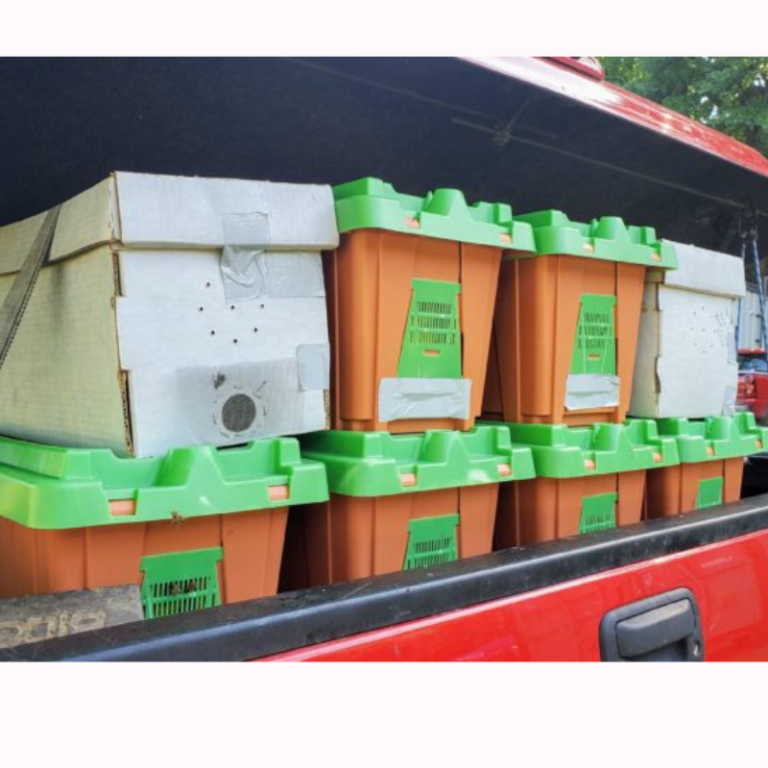
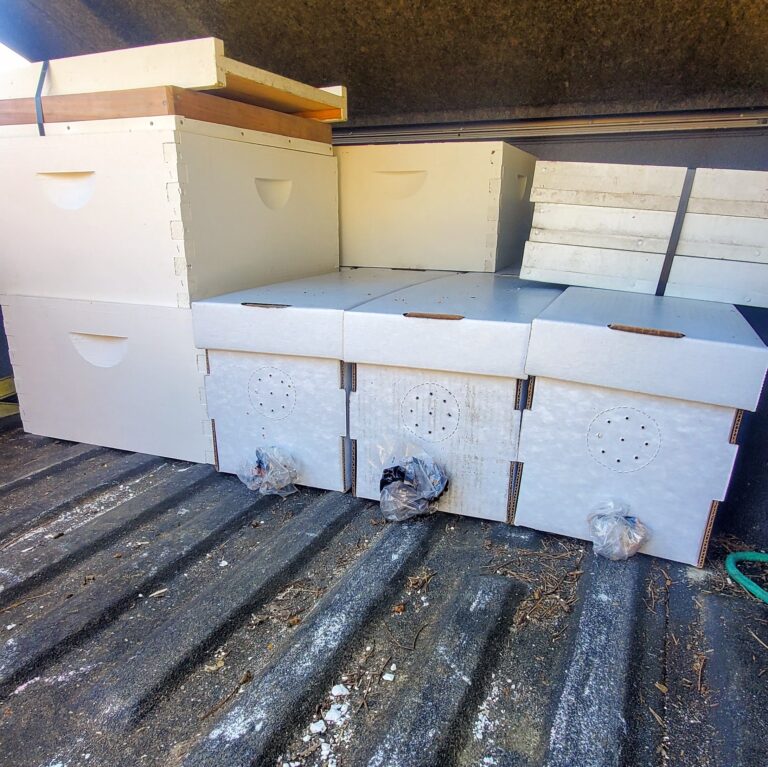
Secure the bees: Before the move, ensure all entrances and movable parts of the nucleus hive are securely closed and fastened. Depending on the type of container that the bees are in, this will vary. The pro nuc will slide down to keep the bees in, but a little extra tape goes a long way. The jester ez nuc has a corrugated door that closes easily. Use ratchet straps or similar secure fastenings to keep the hive components together during the journey. This will prevent accidental opening and escape of the bees.
Stable and Smooth Transport: Position the hive on a flat, stable surface in your vehicle. Use non-slip mats or other stabilizing materials to prevent the hive from sliding or tipping during the drive. The smoother and more stable the ride, the less stress for the bees. The last thing you want is the nuc flipping over in the car or the truck bed.
Maintain Optimal Conditions: Keep the vehicle’s interior temperature moderate to avoid overheating, which can stress the bees and cause them to actually cook. A jester box is more likely to overheat than a pro nuc. If transported in a car, you will want to crank the air conditioning and put the nuc where it will get airflow. If moving the bees in the trunk, you can open up the back seats to get more airflow. If moving in the bed of the truck, try and get as much airflow to the bees as possible.
When transporting a nucleus hive or package of bees, safety is paramount. One practical method is using a specialized mesh bag, such as a Buzz Bag. This bag, equipped with a zipper, provides a secure enclosure for the bees while allowing adequate ventilation.
The zipper ensures the bees are safely contained during transit, reducing the risk of escape and potential stress. This method offers a more controlled and safer way to transport your bees, making it a valuable tip for any beekeeper.
Picking Up Your Nuc
When picking up your nuc, ensure it is securely closed and handle it gently to avoid disturbing the bees. Wear protective clothing, such as a bee suit, gloves, and a veil, to minimize the risk of stings. This isn’t always necessary and depends on how you are picking the nucleus hive up from.
When picking up a nucleus hive, it will typically be closed. But it is common for bees to be congregating on the outside of the nucleus hive. These bees were outside the hive when it was closed by the beekeeper. It’s difficult to get all of the bees off the hive, so be prepared for some bees to be on the outside of the box.
Having a suit or other protective gear is only necessary if you are opening the colony to inspect the frames before buying them.
Storing Your Nuc Before Installation
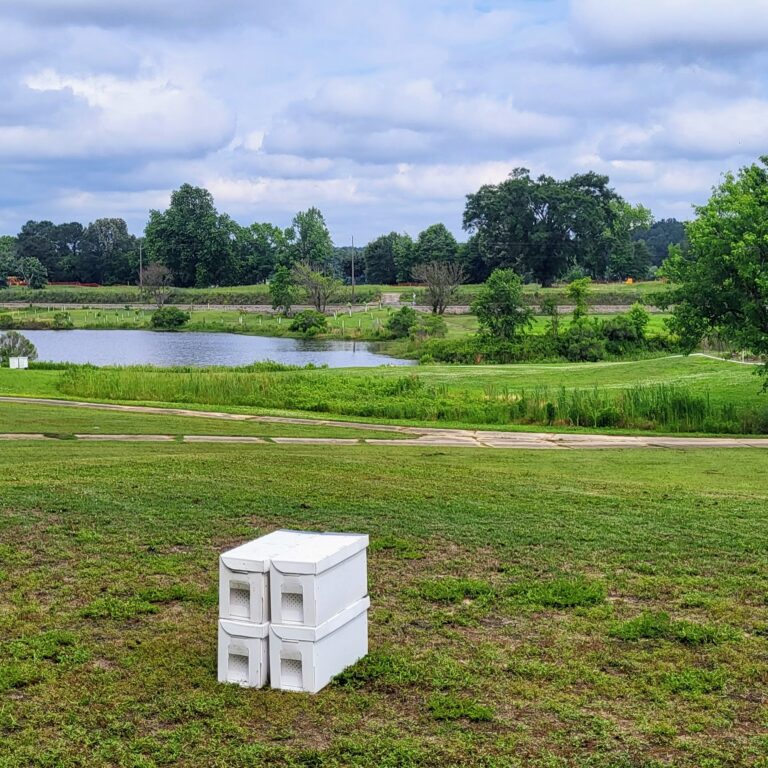
After transporting the nucleus hive to your apiary, you want to set it in place for at least 15 minutes before transferring the frames. You can open the colony quickly and let the bees fly or you can just set them down for 15 minutes to let them settle.
It is not wise to set a nucleus hive in the direct sun when closed for long. A colony of bees produces a lot of heat and can overheat quickly, especially a very large colony.
When setting the nucleus hive in place, you want it to be in place as close to the site of the permanent entrance as possible. This is more important if you are going to delay the actual installation of bees longer than a day.
After this 15-minute period, you can transfer the frames into the permanent hive. But you can delay the actual installation until the next day if necessary. The longer the colony lives in the nucleus hive box, the more likely it will be to get crowded, which can eventually lead to a swarm.
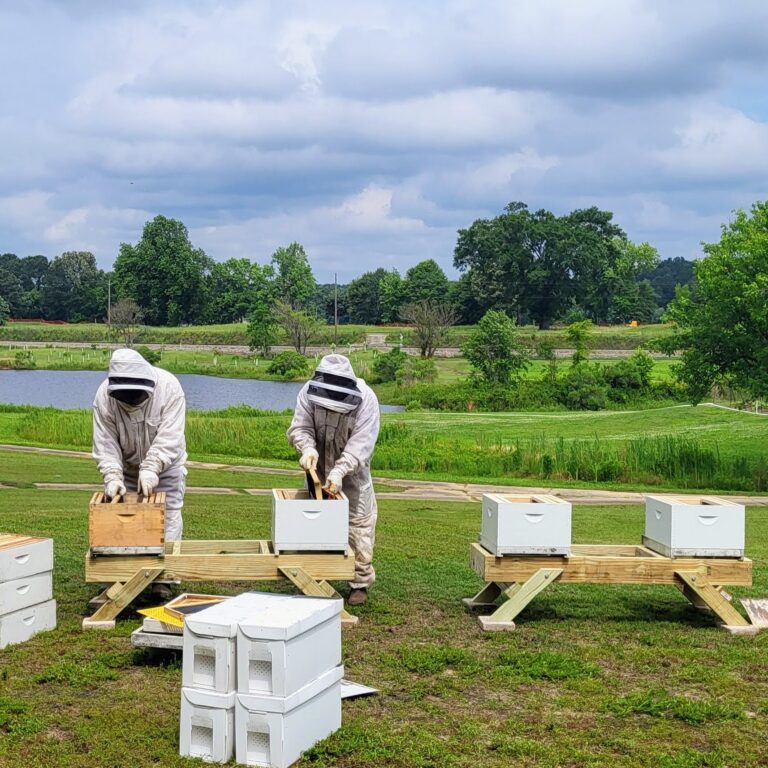
Installing Your Nuc into the New Hive
Once you’ve transported and stored your nuc safely, it’s time to install it into the new hive. This process involves preparing the hive site, transferring frames from the nuc, and integrating the bees into their permanent home.
Following a step-by-step approach will ensure a successful installation and a thriving colony.
Preparing the Hive Site
Selecting a suitable location for your hive is crucial for the success of your colony. Consider factors like sunlight, wind protection, and accessibility when choosing the perfect spot.
Ensure the site is level and adequately shielded from strong winds to provide a stable environment for your bees.
If you don’t know where to setup your colony, read our post on where to set up your hives.
Also, assess the hive-site for access to sunlight, as bees thrive in sunlit areas. This will help them to regulate their temperature and produce honey more efficiently.
It will also help the colony deal with pests like varroa mites and small hive beetles better. The only exception to putting your hives in full sun is if you live in a extremely hot climate like the southwest United States.
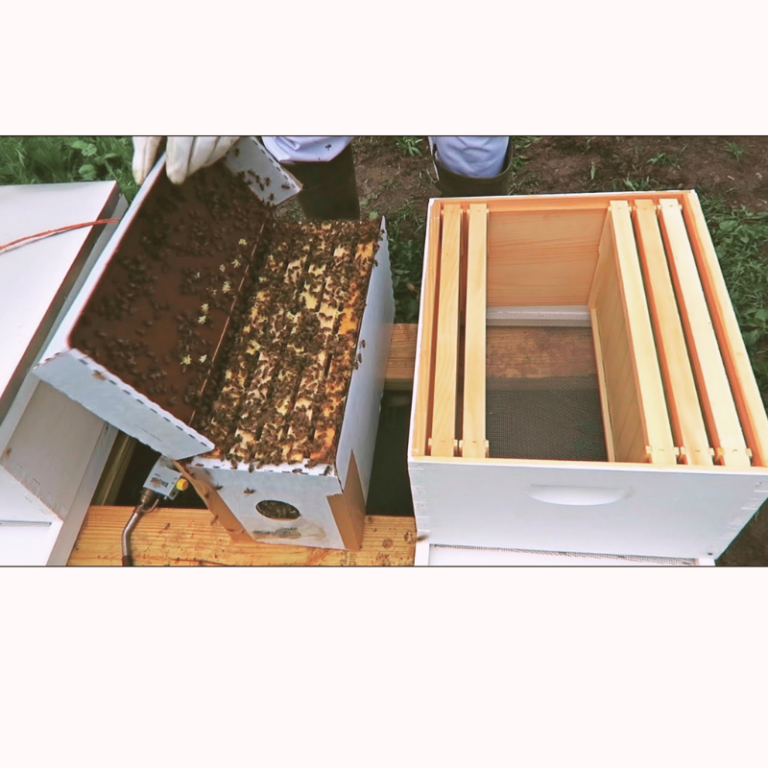
Transferring Frames from the Nuc
To transfer frames from the nuc to the new hive, start by gently removing one of the outer frames from the nuc and placing it over the top of the beehive adjacent to one of the empty frames.
Subsequently, ensure that the frames remain in their original order as you move the remaining frames.
A warm and sunny day, when the bees are actively flying, is the most optimal time to transfer frames from the nuc.
Installing the nucleus hive on a day with good weather will also give you time to inspect each and every frame.
Move Frames One at a Time
The nucleus colony will likely have 5 frames in it. These frames need to be moved into the permanent hive which can either be an 8-frame or 10-frame box.
It is easiest to remove all of the frames from the brood box or deep box before transferring in the frames.
After opening the nucleus hive and gently smoking them, you want to loosen the frames with a hive tool so they are easier to pull out. The first frame will be the hardest to remove.
Carefully lift the first frame up and out of the nuc box. Inspect it and then transfer it into the wooden or permanent box.
Repeat this will the remaining frames until all the frames are in the permanent box. These 5 frames should be in the middle of the box and you can add the remaining frames to either side of these 5 frames. It’s important to have the box completely full of frames without any extra space.
PRO TIP: After placing all the frames in the box and the box is completely full, use your hive tool to push the frames to the middle of the box. All frames should be touching each other and if there is any wiggle room, it should be between the outside frames and the box.
Also, here is a great article on the benefits of using a nucleus hive.
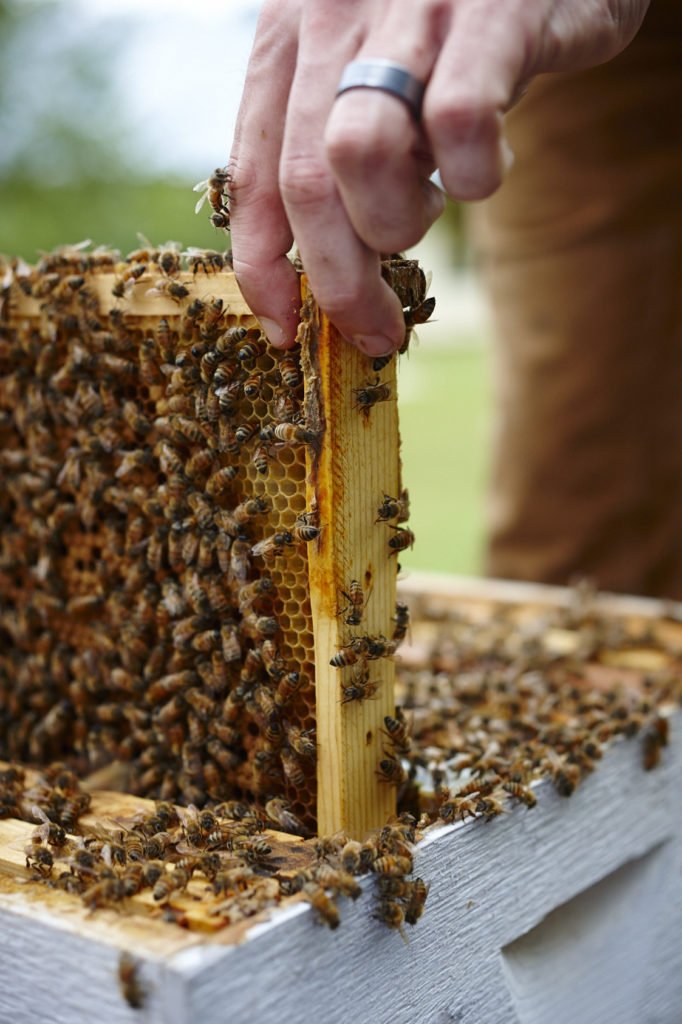
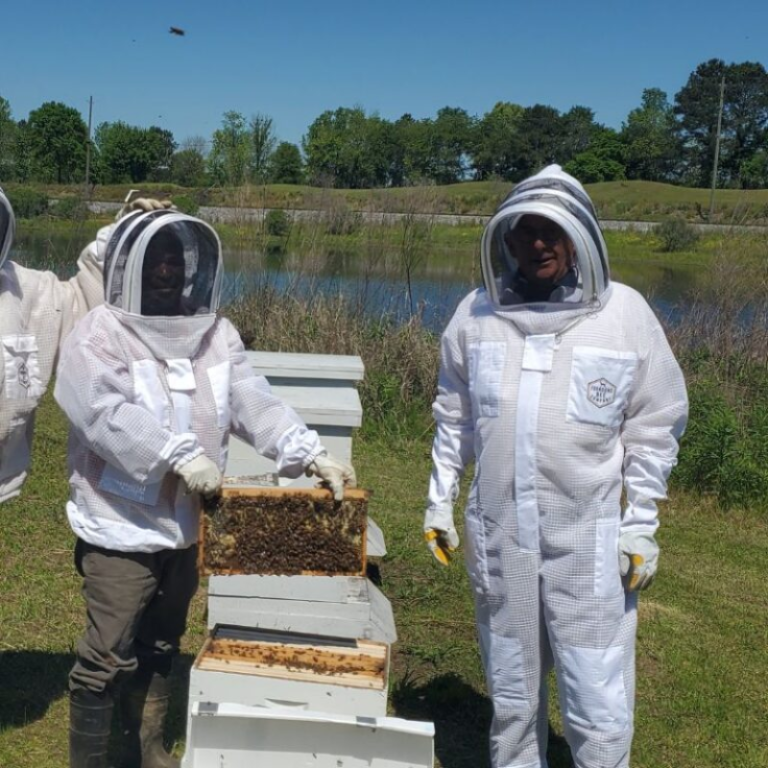
Identify all Parts of the Colony
This is your best opportunity to inspect the colony and identify every part of the colony. You should look for the queen and be able to identify her. She may or may not have a mark on her. You want to identify a worker bee and how she is different than the queen, and you want to try and find drones, which are male bees.
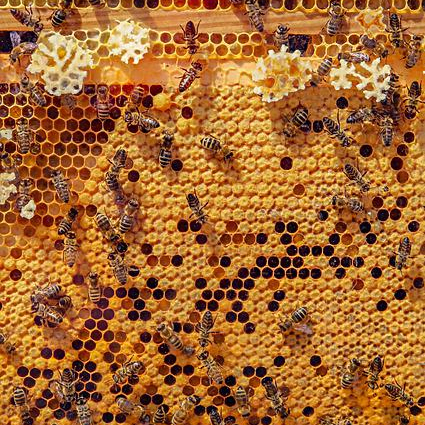
In addition to the adult bees, you want to look at the comb and identify the pollen, honey, and nectar in the cells. You should take the time to identify capped vs. uncapped honey and possibly open a few cells to see what is in them.
You will likely see small hive beetles in the nucleus hives, but not always. It is very unlikely to see varroa mites on the bees. See our Beekeeping Pests blog post on how to check and prevent these kind of pest in your hives.
The brood is a major part of the colony, and identifying it is a required skill. Take the time to look into the cells to see eggs, larvae, and pupa.
Moving Loose Bees Into The Hive
Once the frames have been transferred, it’s time to transfer any remaining bees into their new home. By moving the frames, you will get most of the bees into the new hive.
But there will be some bees that are still inside the nuc. Gently shake or brush the remaining bees from the nuc into the new hive and close the hive to enable the bees to acclimate. Our favorite technique for this is to knock the bees into the corner of the nuc and then pour them in.
You would be surprised how easy it is to pour them in like this.
Limiting the hive entrance with an entrance reducer that allows enough space for worker bees to enter and leave the hive while also making the entrance smaller.
They can be made from wood or metal. This sliding entrance reducer will work with both 8 and 10-frame hives.
Post-Installation Care and Monitoring
After installing your nuc, it’s important to provide proper care and monitoring to ensure the colony thrives. This includes feeding your colony and checking for queen acceptance and laying patterns.
I wish that all you had to do in beekeeping is just put bees in a box and walk away. But unfortunately, you do have to monitor them to make sure they are healthy and growing.
Regular care and inspection will help you identify potential issues early and allow you to address them promptly. It’s easier to solve a problem in the hive when it starts than after it has been developing for weeks.
For example, checking for queen cells and a healthy queen is a good task to do every few weeks.
But going 2 months without looking for queen cells can give the bees an opportunity to swarm and by the time it is noticed, the new queen may be missing or low quality. So it pays to take the time to do a hive inspection every week or two when getting started.
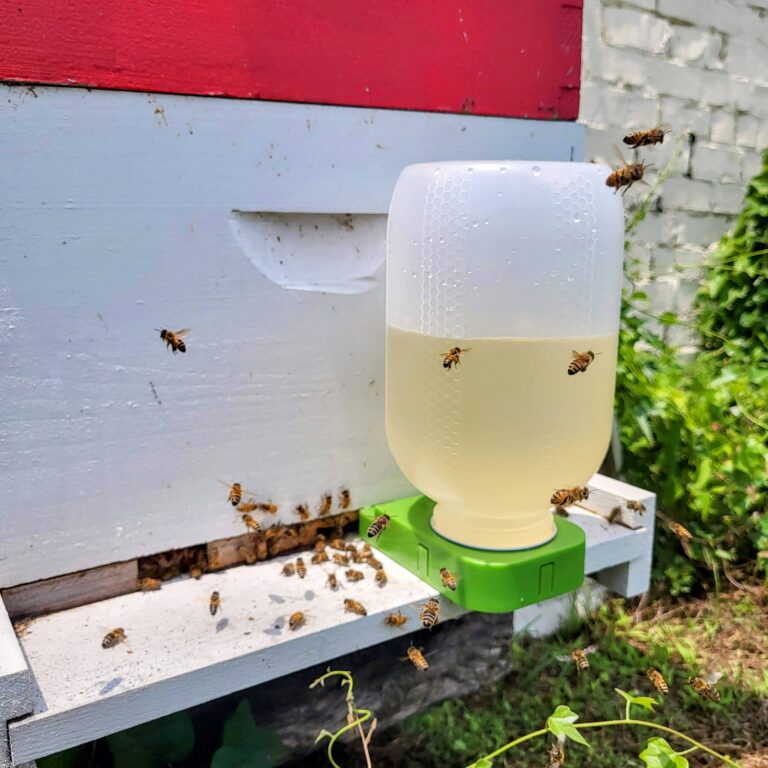
Feeding Your Colony
Feed your colony with sugar water and possibly a pollen patty to help them establish themselves in the new hive. Boardman or entrance feeders are the most common bee feeder to give bees sugar water after the transfer to the hive, providing the bees with a ready energy source.
The sugar water helps the bees to build comb quickly and the energy to function and work.
Using pollen patties or pollen substitutes will help the colony to build up its brood nest quickly. It isn’t always necessary in every area, but it can help a
Continue providing the colony with food as necessary, assessing the hive to ensure the bees are consuming the food, and modifying the amount of food accordingly. The goal is usually to feed your bees until at least 10 medium frames are full of honey or the equivelent.
Checking for Queen Quality and Laying Patterns
Regularly inspect the hive to ensure the queen is accepted by the colony and is laying eggs in a healthy pattern. Observe eggs, larvae, and capped and uncapped brood in the frames, which suggest that the queen has been doing well and the colony is growing.
The best sign of a quality queen is looking at the frames of brood. A healthy queen will have eggs/larvae or pupa in a tight pattern on the frame, and nearly every cell will be full. A consistent queen is a good queen.
A good timeline for inspecting the bees is to do this every 7-10 days.
Troubleshooting Common Nuc Installation Issues


Just the idea of a swarm of bees makes you think of horror movies or maybe something that gives you the chills just thinking about
Even with careful planning and execution, issues may arise during nuc installation. Troubleshooting common nuc installation issues involves addressing aggressive bees and managing swarming or absconding.
Being prepared to handle these challenges will help ensure a successful installation and a thriving colony.
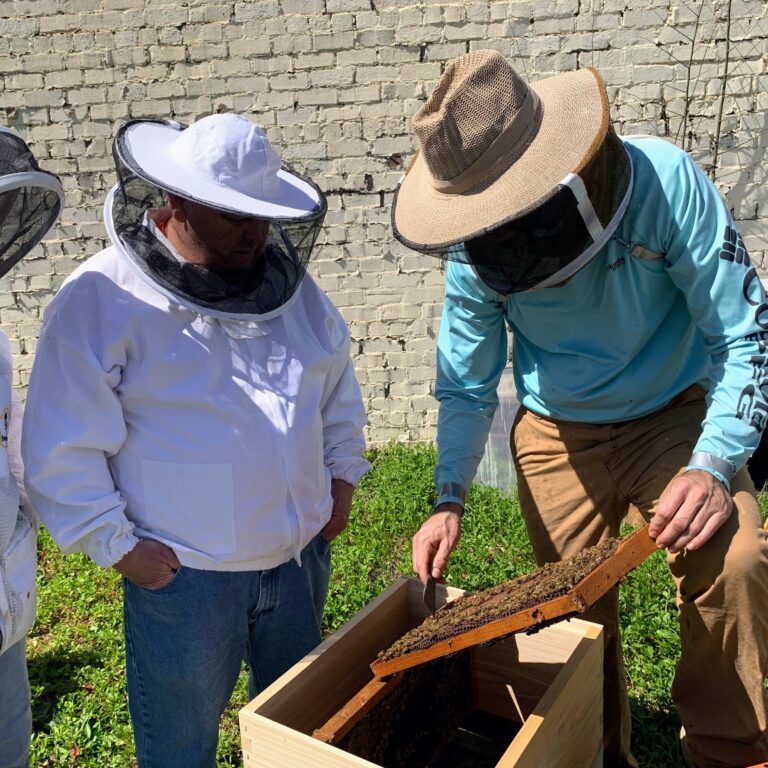
Dealing with Aggressive Bees
If your bees are aggressive during installation, use a smoker to calm them down. Wearing appropriate protective gear, such as a bee suit, gloves, and a veil, will help minimize the risk of stings during the process.
Maintaining a calm and methodical approach while working with bees, and avoiding sudden movements or vibrations, can also help reduce aggressive behavior.
It is common that the bees will be irritated during a move, so it’s smart always to have a smoker, protective gear, and a hive tool available.
Just because bees are aggressive or better described as defensive, that doesn’t mean that the bees will always be like this or that you have Africanized honey bees.
Managing Swarming Or Absconding
To prevent swarming or absconding, ensure your hive has enough space for the colony to grow and monitor for signs of overcrowding. It is smart to stay ahead of the bees instead of always trying to keep up with them.
A colony will decide to swarm weeks before it actually happens, so planning ahead can reduce the urge for the bees to swarm.
Absonding is a different event where the colony of bees completely leaves the nest. This is much more likely to happen with a package of bees than with a nucleus hive.
When it does happen with a nucleus hive or a full sized hive, it is typically because the colony is stressed from pests. A pest like varroa mites or small hive beetle.

One of the most fundamental skills you can learn as a beekeeper is how to light your bee smoker. It is not as easy as
Summary
In conclusion, installing a nucleus hive of bees is an exciting and rewarding experience for both beginner and experienced beekeepers. By understanding nucleus colonies, preparing properly, transporting your nuc safely, installing it into the new hive, and providing post-installation care and monitoring, you set the stage for a thriving apiary.
Remember, with patience, persistence, and a little troubleshooting, you can successfully establish a flourishing colony and enjoy the sweet rewards of beekeeping.
Frequently Asked Questions
What is the best time of day to install a nuc?
The late afternoon or early evening is the recommended time to install a nucleus hive, also known as a nuc hive. During this period, most forager bees have returned to the parent hive, reducing the risk of bees from the new nucleus hive drifting back.
This timing allows the bees to settle into their new hive before nightfall and start exploring the following morning when the weather is typically favorable.
How many bees should be in a nuc?
A nuc typically contains around 10,000 to 15,000 bees, including a queen. This is a full-sized colony in miniature that is well poised to take off and expand quickly under the right conditions.
With sufficient resources and care, these colonies can quickly reach 40,000 or more bees in two months.
Will a nuc produce honey the first year?
No, it is unlikely that a nuc will produce honey the first year. Nucs are often used to get a head start on a new hive, but they require time to build up strength and take in pollen and nectar.
Therefore, though it may be possible, a nuc usually does not produce a significant amount of honey the first year. We tell new beekeepers to hope for honey in the first year, but don’t expect it. The earlier in the spring you start a colony with a nuc, the more likely it is to make excess honey.
What is a nucleus colony (nuc)?
A nucleus colony (nuc) is an essential part of a beekeeping operation, consisting of a mated queen and several frames of worker bees that can be used to increase the number of hives and honey production.
This is different from a package of bees in many ways, but the main difference is a package of bees does not include frames of brood.
How should I prepare the hive location before installing a nucleus hive?
Before installation, ensure the hive location offers protection from extreme weather conditions, receives adequate sunlight, and is easily accessible for future inspections and maintenance. It’s also important to clear the area of any potential obstructions or predators.
Can I install a nucleus hive in any season?
Nucleus hives can be installed in various seasons, but the most common time is during the spring or early summer when bee populations are naturally increasing. This allows the colony to build up strength and take advantage of the blooming season for foraging.
Should I feed the bees after installing a nucleus hive?
Providing supplemental feed to the bees after installation is often recommended, especially if nectar sources are limited. Sugar syrup or commercially available bee feed can be used to ensure the bees have enough food to sustain themselves while they establish the hive.
Should I monitor the mated queen's egg-laying after installation?
Yes, monitoring the queen’s egg-laying is crucial after installation. Regularly check the brood frames to ensure the queen is laying eggs and that the brood pattern is healthy and well-distributed. This indicates the queen’s productivity and the overall health of the nucleus hive.
How do I install a nucleus hive?
To install a nucleus hive, select a suitable location for the hive, prepare the hive equipment, transfer the frames of bees and brood into the new hive, and ensure the bees have easy access to food and water.
What equipment do I need to install a nucleus hive?
You will typically need a hive body or box, frames with foundation or drawn comb, a bottom board, an inner cover, a cover, and protective gear such as a beekeeping suit, gloves, and a veil. You will need more to this, but that is a good start.
Can I install a nucleus hive immediately upon receiving it?
It is generally recommended to install the nucleus hive the same day to prevent stress and ensure the bees have a stable environment. However, if immediate installation is not feasible, it’s crucial to provide proper ventilation, temperature control, and access to food and water for the bees until installation.
How long does it take for a nucleus hive to establish and thrive?
The time it takes for a nucleus hive to establish and thrive can vary. Generally, it may take a few weeks for the bees to build up their population, expand the brood nest, and start foraging their area for pollen and nectar.
How should I monitor the progress of the nucleus hive after installation?
Regular inspections, monitoring of brood development, honey stores, and the overall health of the colony are important. This helps identify any issues, address them promptly, and ensure the hive is thriving.

Adam Hickman
Lorem ipsum dolor sit amet, consectetur adipiscing elit. Ut elit tellus, luctus nec ullamcorper mattis, pulvinar dapibus leo.