Table of Contents
When having to requeen the hive, it can be a stressful situation for both the worker bees and the beekeeper. Many things can go wrong when a colony of bees decides to replace its queen with a new queen.
When left to the bees to perform this task, usually the colony will be successful, but there is always a chance the queen will not be successful and the colony will die.
In this post, we are talking about how a beekeeper can introduce a queen to a colony. This is a common task that beekeepers will do to help their bees.
Read our post on how to buy a queen to see the options available. The most common ways a new queen is introduced to a colony is through a queen cell or a mated queen.
Common Reasons For Queen Replacement
A queen is often replaced by her colony naturally without the beekeeper even knowing it. The old queen is commonly replaced because she is injured, not producing enough of her queen pheromone (getting old), or is not laying enough eggs to meet the needs of the colony.
The beekeeper may replace the queen for the same reasons, or they may not be replacing the queen but adding a new queen to a hive that was made queenless on purpose.
Replacing a failing queen, dead queen or adding a queen to newly created colony are the main reasons a beekeeper will want to introduce a queen.
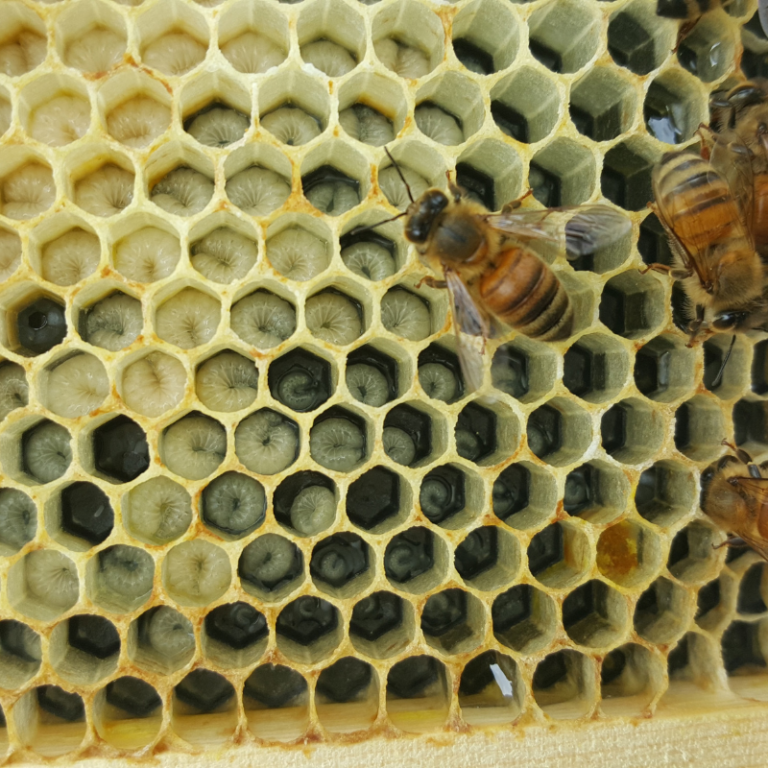
When a hive naturally replaces the queen, they take a very young larva and feed it royal jelly, shaping its cell into a queen cup, then into a queen cell where she will hatch out and take her mating flights before starting to lay eggs.
When To Install A Queen
There are times when a colony of bees will die without the help of their beekeeper. There is only a short window when bees can successfully replace their queen.
If the colony isn’t thriving in that window, which is less than a week, there is no chance it will survive on its own.
Even if the strongest, healthiest colony loses its queen and fails to replace her, the colony will die.
This is an excellent example of a beekeeper needing to do something to help their colony.
The beekeeper can help their bees in multiple ways in this situation, but the beekeeper will need to step in.
Another time a beekeeper will need to introduce a queen is when the colony is queenless at a time of the year when there are no drones for the queen to mate with.
Male bees are required when the young queen goes on her mating flights, and male bees are in short supply after the summer and during the winter.
If a colony goes queenless at this time, they will need a mated queen introduced. Or if that isn’t an option, the colony can be combined. Read our blog on how to combine two colonies of bees.
Options For Requeening A Queenless Hive
When it’s time for requeening a colony of bees, there are only four options for the beekeeper. Which option the beekeeper chooses is based on the situation, queen availability, and the time of the year. You don’t have to be an expert at queen rearing to requeen a hive.

5 Ways to Fix a Package Queen that Failed
Fixing a failed or dead queen in a beehive can be frustrating, especially when it is the queen in your newly purchased package of bees.
Requeen With Queen Cells
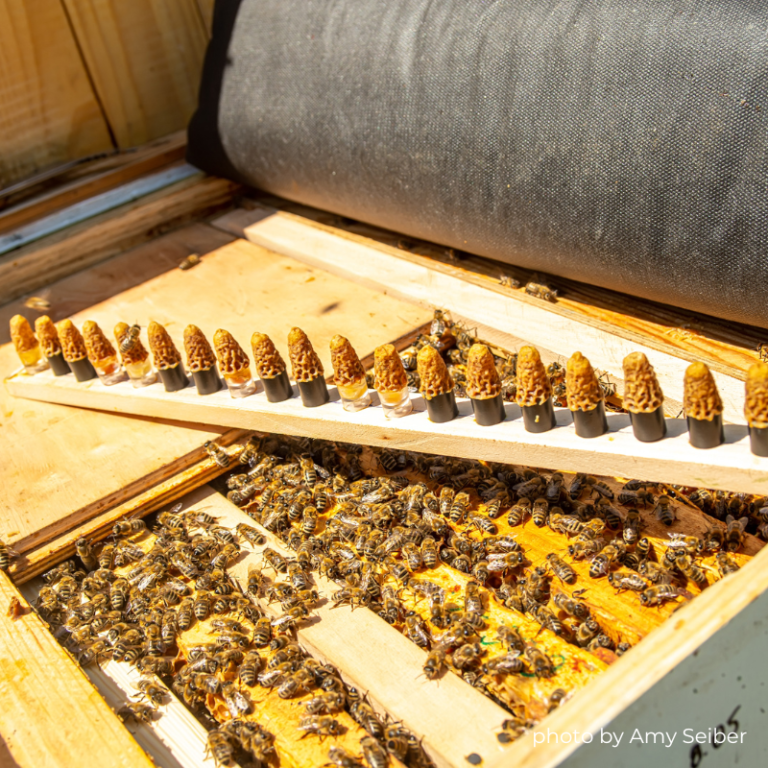
Using a queen cell involves either having a capped queen cell from another hive available or buying queen cells from a beekeeper who raises queens. This option is not very popular as queens are only in their cell for a very short time before hatching.
Installing a queen cell involves placing the queen cell or queen cells in the queenless hive, suspending the cell between the comb in the brood nest so she can easily hatch out of the cell.
When introducing a queen cell, it can take about three weeks for her to start laying eggs.
Introducing Frames Of Eggs
When worker bees miss their window to raise a queen themselves or the queen never comes back from her mating flights, it is possible to give the colony another chance. To do this, you must have a frame of eggs and young larva that can be moved into the queenless hive.
This gives the colony another chance to turn young larvae into a queen cup > queen cell > virgin queen > mated and laying queen. This is considered requeening a hive naturally, but there is more room for error when doing it this way.
To introduce a frame of eggs, you must have a frame readily available to donate into the queenless hive and drones for the queen to mate with. Introducing a frame of eggs can take 3-5 weeks for the queen to start laying eggs.
Requeen with a Mated Queen
This is the most common way to introduce a queen to a queenless colony. Queen breeders commonly sell mated queens which can be shipped nationwide.
The breeder will raise the queen successfully in one of their hives, verify that she is laying eggs, then place her in a queen cage and send her to a beekeeper who needs a mated queen.
Once the colony accepts the queen, she will start laying eggs immediately. From the time of introduction to laying eggs can be anywhere from 3-7 days.
Combining a Queenless Hive with Another Hive
This option is usually reserved for the fall in preparation for winter. A queenless colony may be very weak and not have many resources and is likely unable to survive the winter.
When this is the case, combining the queenless colony with a queen-right colony is usually better. This isn’t requeening the hive but is a solution when you have a queenless colony.
This technique is called a newspaper combine or combining a hive.
Basics Of Requeening A Hive
When introducing a queen to a colony of worker bees, you are trying to convince those bees to accept that queen. Even if a beehive is queenless and will die without help, a beekeeper could introduce the queen only to have the queen killed by the worker bees.
The queenless hive will do this because they don’t know the queen and see her as a foreign bee that shouldn’t be in their hive. It doesn’t make sense that a bee colony would do this, but it’s common.
When introducing a queen, you do your best to get the bee hive to accept the new queen; there are tricks for doing this.
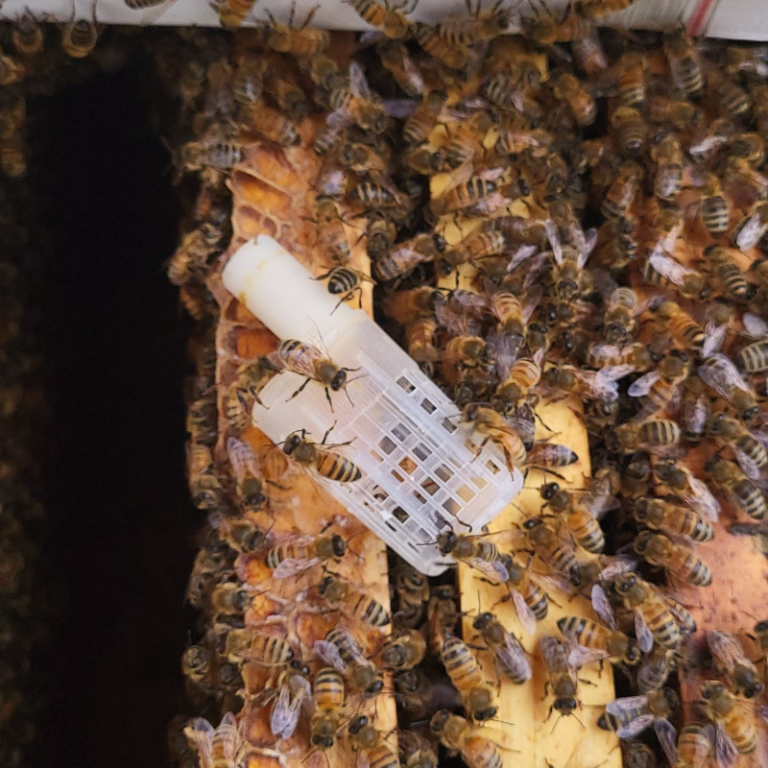
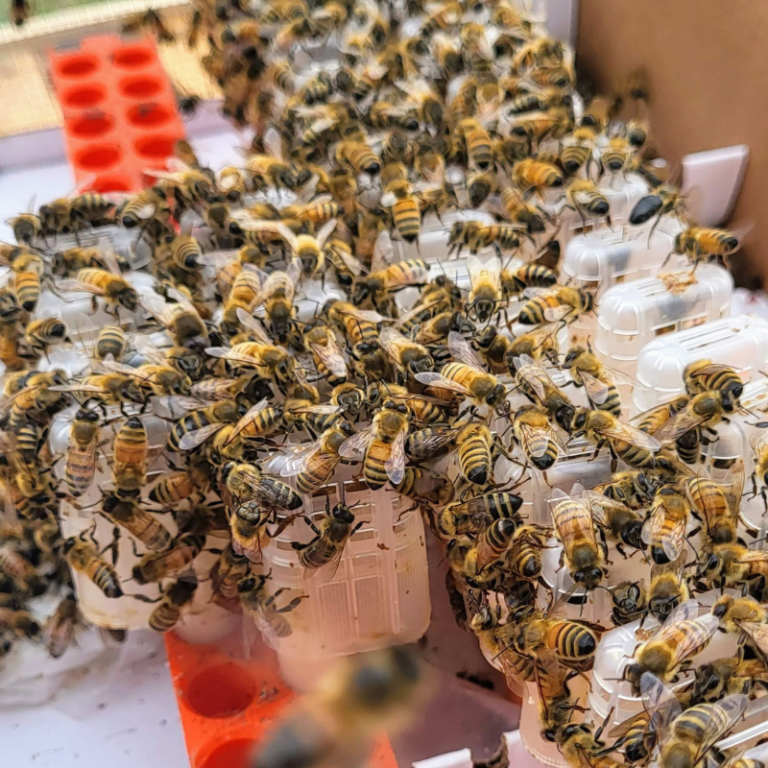
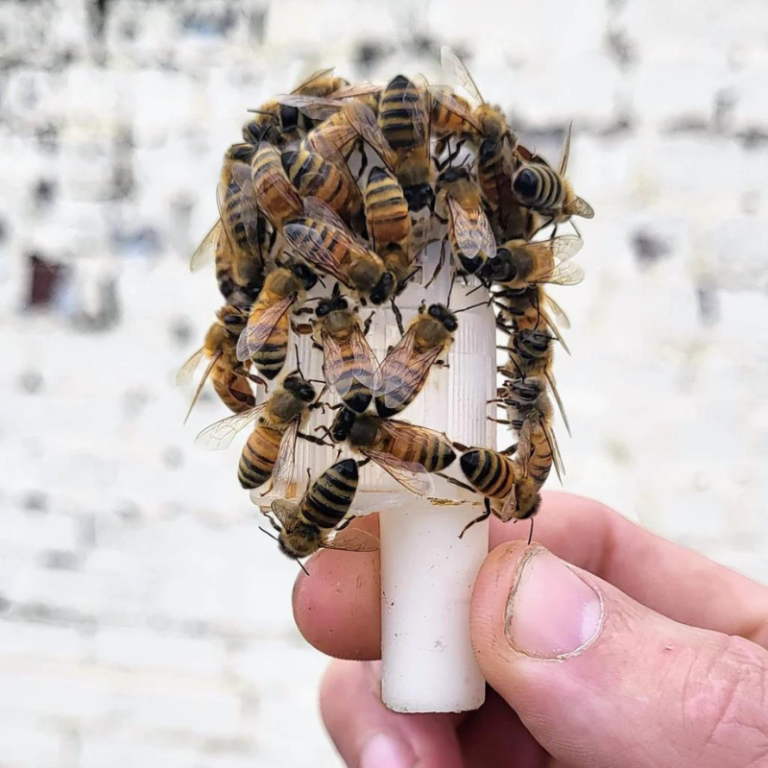
When you buy a mated queen, she comes in a queen cage with many different designs. The most common is the JZBZ cage and the 3-hole queen cage.
Both designs allow the queen to stay in the cage, usually with a few attendants (nurse bees) to help care for her. These cages also feature a candy plug to serve as a time-release, so she doesn’t leave the cage too quickly.

Buying queens for your bees can be a little overwhelming, but as the beekeeper you have multiple options from queen cells to mated queens
Candy Plug on Queen Cages
The candy plug is your best friend when introducing a new queen. The candy plug is literally a fondant or sugar paste that has been pushed into the only exit or entrance on the queen cage.
The bees inside and outside the cage will eat through the candy over a few days. This candy plug is so important because it gives the queenless hive multiple days to accept the new queen
Queen Pheromones
Inside the colony, the smells produced by the queen, workers, brood, comb, nurse bees, and more are all called pheromones. We can’t smell them, but this is how bees communicate with each other.
A colony will kill your introduced queen because they don’t know her pheromones. But give the bees a few days to get used to her through the queen cage, and her pheromones will make them accept her.
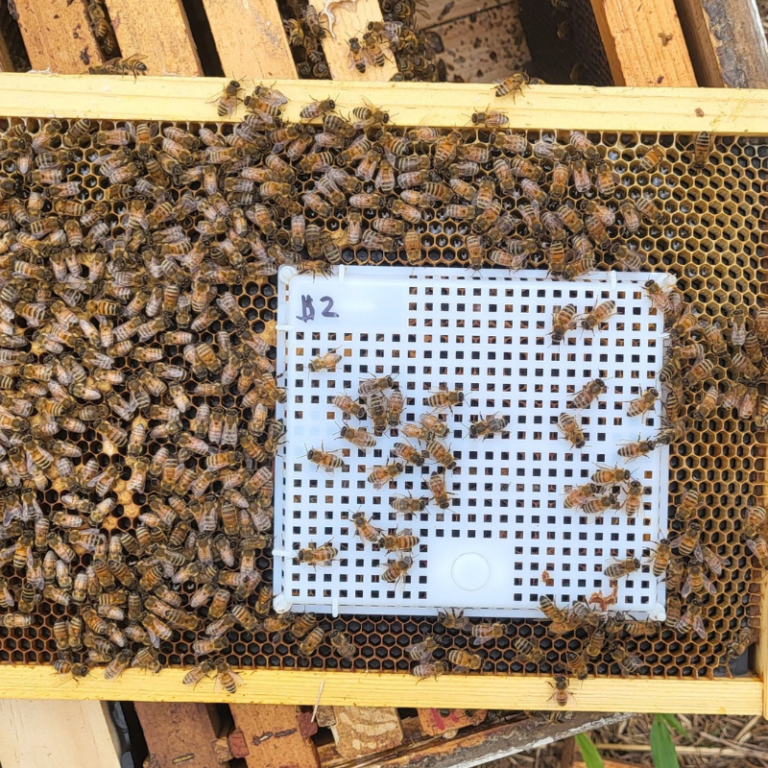
In a queenless colony, there is likely not any brood or larva. One way to use pheromones to your advantage is a queen introduction cage. This is a plastic or hardware cloth cage you can use to give the new queen a patch of comb to start laying eggs.
The presence of a queen that is laying eggs in a queenless hive is a great way to ensure acceptance. The introduction cage is temporary until the queen starts laying eggs; the pheromones and eggs help the bees accept her.
Techniques to Requeen a Hive Successfully
Before attempting to requeen a hive, you cant have an old queen bee still in the hive or any queen cups or queen cells. Having any of these in the hive dramatically increases the chance that the new queen will not be accepted.
Queen cages are designed to transport queens and introduce them to their new colony safely. The mesh screen is designed to keep the queen physically separate from the new bees but still allow the queen’s pheromone to spread.
When introducing the queen to the colony, you want to place the queen cell in the brood nest (or where the brood nest was) and give the worker bees full access to the outside of the queen cage.
Inside the colony, the smells produced by the queen, workers, brood, comb, nurse bees, and more are all called pheromones.
We can’t smell them, but this is how bees communicate with each other. A colony will kill your introduced queen because they don’t know her pheromones.
But give the bees a few days to get used to her through the queen cage, and her pheromones will make them accept her.
In a queenless colony, there is likely not any brood or larva. One way to use pheromones to your advantage is a queen introduction cage.
This is a plastic or hardware cloth cage you can use to give the new queen a patch of comb to start laying eggs. The presence of a queen that is laying eggs in a queenless hive is a great way to ensure acceptance.
The introduction cage is temporary until the queen starts laying eggs; the pheromones and eggs help the bees accept her.
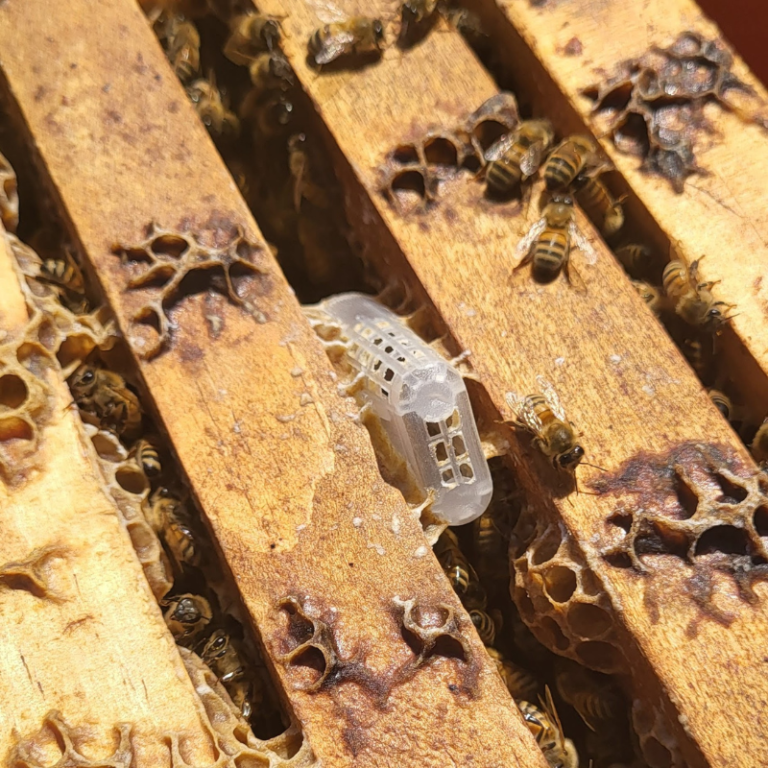
Suspend the Queen Cage
Suspending the queen cage where the brood nest is or was is usually where most nurse bees are. You want as many worker bees as possible to surround the queen cage.
The way the queen cage is secured is up to the beekeeper, but you want to make sure the queen cage is safely placed towards the top of the comb in the middle of the hive.
Placing the queen cage towards the top of the frame keeps her away from any drafts that may come from outside the hive through the entrance or screened bottom board. It also makes it easier to open the hive to see if the queen has been released.
Candy Plug
Note that the bees need access to the queen cage’s candy end. Depending on the type of cage, a plastic cap or a cork can cover the candy. This needs to be removed before placing the queen cage in the hive.
You can secure the queen cage in this location with a rubber band, string, or anything like this. It’s common to wedge the queen cage between two frames of drawn comb, which will hold it in place. If you don’t have drawn comb, it’s common to use a large rubber band to keep it in place.
Don't Rush Releasing The Queen
Beekeepers commonly rush to release the queen and get her to lay eggs. This is perfectly understandable, but releasing the queen too early is risky. A good rule of thumb is to allow the bees three days to get used to the queen. This is also about the same time it takes the bees to chew through the candy end of the queen cage.
Pushing a very small hole in the candy plug in the queen cage is sometimes advised. This isn’t always necessary, and we find it just a way to rush the queen’s exit. Only when the fondant or candy is very hard will we do this.
Which Direction To Place The Queen Cage?
If you have been around beekeepers for any time, you know that most beekeepers have an opinion. This is also true for orienting the queen cage in the hive. You face it so the candy plug is up, so if a bee dies, they don’t plug the hole.
You can do it with the candy plug facing down because this is how queen cells are oriented. You can turn the candy plug sideways so it’s less likely to fall.
Whichever way you orient the queen cage, you just want to ensure it is secure and the worker bees have full access to the outside of the cage and the candy plug. All the methods will work, and techniques will vary based on if you have drawn comb and the type of queen cage you are using.
Releasing the Queen
Ideally, the bees chew through the candy plug and release the queen. But sometimes this doesn’t happen even though three days have passed. This could be because the population is low, the candy is too hard, or the bees couldn’t access the fondant. After three days, it’s good to look at the queen’s cage to see if the queen has been released.
If she has been released, that is good news, and you can remove the queen cage. If she is still in the cage, you can see how the bees react to her. If you still see bees acting erratically on the outside of the cage and trying to bite the cage, she is still not ready to be released, and you may have another queen already in the hive. But if they largely ignore it or walk around the cage, you can release her.
Checking For a Laying Queen
It’s very easy to confirm if the queen release has been successful. About 10-14 days after placing the queen in the hive, you can inspect the frames for eggs, larvae, or possibly capped brood.
The white larvae will be the easiest to see, especially if you use black foundation. You should see proof of the queen in the hive in two weeks.
If three weeks go by and there are no new eggs or larvae, the queen is not accepted, and you have to start over.
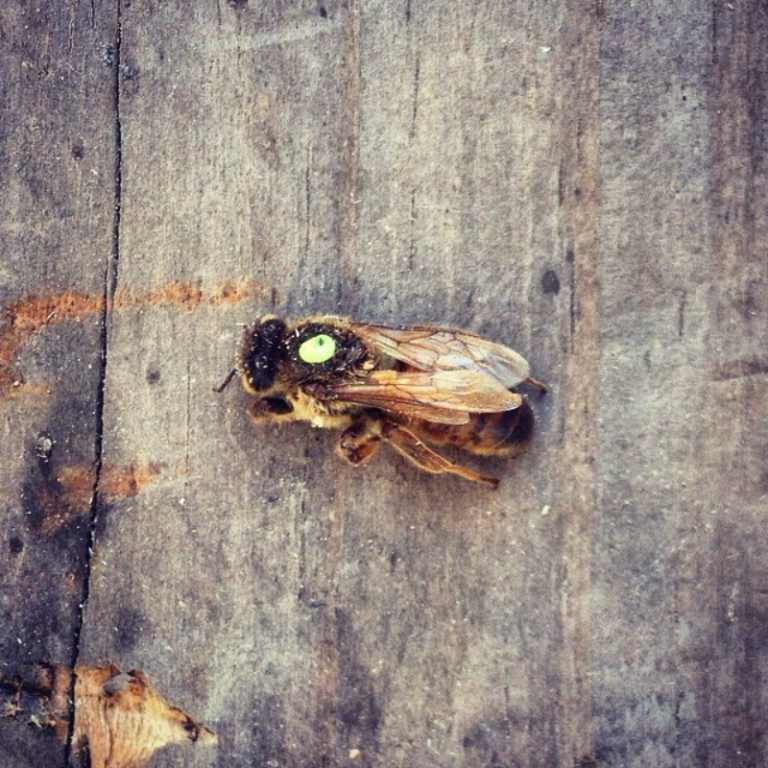
The queen can either be marked or unmarked. If she is marked, it will make it a little easier to find her in the future. It will also let you know if your new queen has swarmed. Read our post all about marking queens.